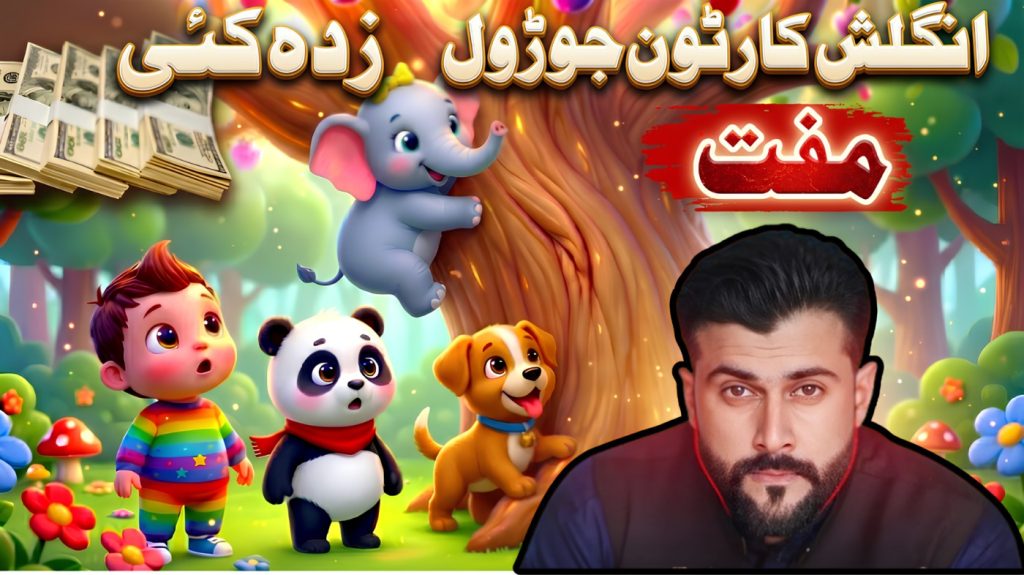

If you’ve been scrolling through YouTube Shorts recently, you’ve likely seen the trend: simple, wholesome cartoon stories featuring baby animals and toddlers racking up tens of millions of views each. These aren’t big studio productions — they’re AI-generated videos made by individual creators using completely free tools.
What’s behind this surge? Parents often give their phones to kids for quick, easy entertainment. The YouTube algorithm strongly favors high completion rates on short, emotionally engaging stories. And AI has now made high-quality animation possible for anyone who has a good story idea and some patience.
In this tutorial, I’ll show you the exact step-by-step process that top channels in this niche are using. You’ll discover how to create consistent characters, build captivating 2-minute stories, and bring them to life using only free AI tools. No animation experience or expensive software is needed.
Why This Type of Content Works (And Why It’s Booming Right Now)
The Psychology Behind the Massive Views Kids’ content performs extremely well because it appeals to two groups at once: children love bright, colorful characters and easy-to-follow stories, while parents appreciate content that feels safe, positive, and wholesome. The “cute baby animal friends going on adventures” format perfectly satisfies both.
Why AI Is Perfect for This Style Traditional animation demands large teams and months of work. With today’s AI tools, a single person can:
- Create consistent character designs in just minutes
- Generate 18 or more scene variations without any drawing
- Automatically turn static images into smooth video clips
- Produce friendly, child-friendly voiceovers in natural cartoon tones
The difference in quality between AI-generated and professional animation is getting smaller every month. For YouTube Shorts, audiences already accept — and often prefer — the unique AI look.
The Big Opportunity Channels in this niche are regularly getting 50 million+ views per short. The only real barrier is knowing the right process — understanding which tools to use and how to keep the visuals consistent throughout the video. That’s precisely what this tutorial will teach you.
Tools You’ll Need (All Free or Freemium)
| Tool | Purpose | Why It Matters |
|---|---|---|
| Grok (xAI) or Claude (Anthropic) | Story generation, scene structuring, prompt engineering | They handle the creative work — turning your basic idea into well-structured scenes with strong prompts |
| Google AI Studio | Voiceover generation | Free text-to-speech with “Chirp 3” voices that sound natural and suitable for cartoons |
| Wisk or Midjourney | Character and scene image generation | Creates the visual assets; Visk gives good free generations with strong aspect ratio control |
| Meta AI (Vibes) | Image-to-video animation | Completely free tool that adds realistic motion to your static images using text prompts |
| CapCut or similar | Final editing | For assembling clips, adding transitions, background music, and exporting |
Note on tool choices: I suggest using Grok or Claude for the story writing part because they manage long-context storytelling very effectively. For image generation, feel free to use any tool you have access to — Visk, Leonardo, or Midjourney all work well as long as you can control the aspect ratio.
Step-by-Step Creation Workflow
Step 1:
Generate Your Story Foundation What to do: Use an AI chatbot (Grok or Claude) to create a complete 2–2.5 minute children’s story broken down into well-structured scenes. Why it matters: Random story generation usually produces weak results. You need a proper narrative arc — clear setup, a problem, resolution, and an emotional payoff. Children’s stories especially require simple cause-and-effect logic.
The process:
- Open Grok or Claude
- Use the structured prompt (provided in the ULTRA MASTER PROMPT section below) that instructs the AI to:
- Generate 10 story ideas for you to choose from
- Expand your selected idea into 18 detailed scenes
- Create consistent character descriptions
- Output both image prompts and motion prompts for every scene
Common beginner mistake: Taking the very first story the AI gives you. Always request multiple options and pick the one with the strongest emotional hook. Stories centered on themes like “sharing” or “friendship” tend to perform much better than random adventure plots.
Step 2:
Create Consistent Characters What to do: Before making any scenes, generate reference images of your main characters. Why it matters: AI image generators often fail at keeping characters consistent. If your “baby panda” looks different in every scene, kids notice it immediately and the algorithm punishes poor retention. Using reference images fixes this problem.
The process:
- Take the character descriptions from your story generation
- Generate each character separately using a 1:1 aspect ratio
- Save 2–4 different variations of each character (different angles work best)
- Upload these reference images as “subject references” in your image generator for all future scene creation
Pro tip: Give each character a unique visual feature — a specific colored accessory, a distinct size difference, or a signature expression. This helps both the AI and young viewers recognize them instantly across scenes.
Step 3:
Generate Scene Images What to do: Create static images for each of your 18 story beats. Why it matters: These images will serve as the foundation for your video. Every image must accurately match the story moment, include the correct characters, and follow the same art style.
The process:
- Use the detailed image prompts that were generated in Step 1
- Set the aspect ratio to 9:16 for vertical short-form video
- Upload your character reference images as “subjects” so the AI includes the right characters
- Generate 2–3 variations for each scene and choose the best one
- Maintain strict art style consistency — if Scene 1 uses “soft watercolor,” every single scene must include that same style description
Common beginner mistake: Switching art styles between scenes just because one looks better. Consistency is far more important than occasional quality spikes. Choose one style and stick with it throughout.
Step 4:
Animate Images to Video What to do: Turn your 18 static images into short video clips by adding motion. Why it matters: Pure slideshows don’t hold attention. You need gentle movement — characters breathing, leaves moving, slow camera pushes — to make the video engaging. This is where Meta AI’s free Vibes tool excels.
The process:
- Go to Meta AI and open the “Vibes” feature
- Upload your first scene image
- Switch the mode from “Image” to “Video”
- Paste the matching motion prompt from your Step 1 generation (these describe exactly how the scene should move)
- Generate and download the clip
- Repeat for all 18 scenes
Why this works: The motion prompts you created earlier give specific directions like “baby panda slowly reaches for fruit,” “gentle camera push-in,” or “leaves rustling in the background.” This guides Meta AI instead of giving vague instructions.
Time-saving tip: Don’t wait for one video to finish before starting the next. Open multiple browser tabs and process them in batches.
Step 5:
Create Voiceover What to do: Generate warm, cartoon-style narration for your full story. Why it matters: Kids’ content needs clear, friendly, and expressive narration. Robotic voices destroy engagement. Google AI Studio provides excellent voices made for this purpose.
The process:
- Go to Google AI Studio
- Select “Text to Speech”
- Choose the “Chirp 3” model and “Single Speaker Audio”
- In the “Style Instructions” field, paste the voice style guide (provided in the Master Prompts section below) that defines tone, pacing, and emotional delivery
- Paste the complete story text
- Select the voice that sounds the warmest and most natural (check the spelling provided in the tools section)
- Generate and download the audio
Common beginner mistake: Using default TTS settings without style instructions. The “style instructions” field is critical — it tells the AI how to speak, not just what to say. Without it, the voice sounds flat and robotic.
Step 6: Assemble and Edit What to do: Put together all the video clips, voiceover, and music in your editing app. Why it matters: Good pacing is what keeps viewers watching. Kids lose interest and swipe away the second they get bored. Smooth editing and transitions are essential.
The process:
- Import all 18 video clips into CapCut (or your preferred editor)
- Import your voiceover audio track
- Arrange the clips on the timeline to perfectly match the narration
- Add gentle transitions between scenes — use soft wipes or smooth fades (avoid abrupt hard cuts)
- Add background music: search for “upbeat kids instrumental” or “gentle adventure music”
- Reduce the music volume to 15–20% so it doesn’t overpower the narration
- Export in the highest resolution possible (1080p or 4K if available)
Retention hack: Watch your final video with the sound turned off. If the story is still clear just from the visuals — characters moving, actions visible, emotions obvious — then you’ve nailed it. Many kids watch these videos on mute at first.
ULTRA MASTER PROMPT (ALL IN ONE)
Below is the complete master prompt used to generate story ideas and fully structured scenes. This prompt turns every scene into detailed image prompts and motion prompts ready for AI video generation. This is shared for educational purposes only. Feel free to customize it for your chosen AI tool.
You are a world-class AI Kids Story Creator + Cinematic Visual Director + Character Design Specialist.
Your mission is to:
- Create viral, high-retention children’s stories
- Design perfectly consistent cinematic characters
- Convert stories into short-form video scenes optimized for YouTube Shorts, Reels, and TikTok
STEP 1: GENERATE STORY IDEAS
Generate 10 unique, viral, and emotionally engaging kids story ideas.
Each idea MUST include:
- Baby Panda
- Baby Elephant
- Puppy
- Baby Kid
Make them:
- Fun, emotional, adventurous, funny, or magical
- Highly clickable and YouTube-viral friendly
Then STOP and ask: “Which idea do you choose? (1–10)”
STEP 2: STORY GENERATION
After the user selects an idea:
Write a highly engaging story with:
- Length: 200–350 words (STRICT)
- Duration target: ≤ 1.5 minutes
- NO dialogue
- Simple, easy-to-understand English
- Strong emotional HOOK in the first 2 lines
- Cute + emotional + engaging flow
- Clear structure: beginning → middle → satisfying ending
- Characters: Baby Panda (cute, chubby), Baby Elephant (playful), Puppy (energetic), Baby Kid (adorable toddler)
- Optional: Add a short moral at the end
After writing the story, STOP and ask: “Do you want character design prompts? (yes/no)”
STEP 3: CHARACTER DESIGN PROMPTS
If the user says YES:
Generate 4 CHARACTER PROMPTS (one for each character):
VISUAL STYLE (VERY IMPORTANT — APPLY TO ALL): 3D kids cartoon nursery-rhyme style Hyper-saturated bright colors (candy-like palette) Smooth, soft plastic-like textures Big glossy eyes with strong reflections Rounded, chubby, toy-like proportions Clean soft shading, minimal realism Soft global illumination, no harsh shadows Ultra-cute, expressive facial design Studio lighting with clean white background
RULES:
- White background ONLY
- Full body shot
- Centered composition
- No environment distractions
- Ultra detailed
Characters:
- Baby Panda
- Baby Elephant
- Puppy
- Baby Kid
Each prompt must be written as a 6–8 line paragraph.
After generating the character prompts, STOP and ask: “Do you want cinematic image + motion prompts? (yes/no)”
STEP 4: CINEMATIC SCENE GENERATION
If the user says YES:
SCENE LOGIC:
- Estimate the story duration
- Each scene = 4–6 seconds
- Generate 15–20 scenes in total
SCENE RULES
- Break the story into the smallest possible moments
- 1 scene = 1 moment ONLY
- No overlapping actions
IMAGE PROMPT RULES (UPDATED STYLE APPLIED)
Each IMAGE PROMPT must follow this exact structure:
STRUCTURE: EXACTLY 7 lines
STYLE (MANDATORY IN LINE 1): “3D kids cartoon nursery-rhyme style, ultra high quality, hyper-saturated colors, soft plastic textures, big glossy eyes, soft global lighting, clean rendering, ultra cute design”
CONTENT RULES:
- Line 2–5: FULL character descriptions (include ALL FOUR characters EVERY TIME)
- Line 6: Simple, colorful environment (clean, soft, non-detailed background)
- Line 7: Static pose + emotion + camera framing ONLY
STRICTLY NO:
- Actions
- Movement
MOTION PROMPT RULES (UPGRADED — HIGH DETAIL)
Each motion prompt MUST include:
- Duration: 4–6 seconds
- Clear animation breakdown:
- Starting pose
- Transition movement
- Main action
- Ending pose
- Character animation details:
- Body movement
- Facial expression change
- Eye movement
- Secondary motion (ears, hands, tail, clothes)
- Environment motion:
- Subtle background movement (grass sway, light shift, particles, etc.)
- Camera movement:
- Smooth pan / slight zoom / follow tracking
- No shaky or complex moves
- Animation style:
- Soft, bouncy, cartoon-like motion
- Exaggerated but smooth (kid-friendly physics)
OUTPUT FORMAT
Scene 1: Image Prompt: (Line 1) (Line 2) (Line 3) (Line 4) (Line 5) (Line 6) (Line 7) Motion Prompt: (Highly detailed animation breakdown)
Continue this format until the full story is covered (15–20 scenes).
MASTER SYSTEM RULES
- Maximize watch time and viewer retention
- Keep visuals simple but highly attractive
- Maintain perfect character consistency across all scenes
- Every image prompt must be a complete, standalone generation prompt
Disclaimer: These prompts are for educational purposes only. Results may vary depending on AI tool and customization.
VOICE STYLE INSTRUCTIONS
Energetic cartoon male voice with a playful, slightly high-pitched tone, exaggerated expressions, and a fun, bouncy delivery like a friendly animated character.
Clear simple English, medium-fast pace with lively ups and downs, adding excitement, curiosity, and warmth to keep kids fully engaged.
Why These Prompts Work
The master prompts are not just simple “write me a story” requests. They are carefully engineered for a complete production pipeline:
Structure enforcement: The prompt specifically requires 18 scenes. Why 18? Because that gives roughly 8–10 seconds per scene, which is ideal for 2–2.5 minute videos that perform strongly in the YouTube Shorts algorithm.
Visual consistency locks: By forcing the AI to first define characters in detail (for example, “Baby Panda: small, fluffy, always wears a red leaf behind its ear”), you get ready-to-copy descriptions that keep your image generator perfectly on-model across every scene.
Motion prompting: Most people just upload images and hope for good results when animating. These prompts create precise motion instructions — such as “slow zoom in,” “character blinks twice,” or “leaves flutter down” — that give the video AI clear direction instead of vague guesses.
Voice direction: The style instructions for Google AI Studio go far beyond generic “be friendly.” They specify exact pacing, emotional beats, and voice distinctions that make the narration feel professionally performed rather than simply read aloud.
The end result is a smooth chain of AI tools where each step feeds naturally into the next, producing assets that fit together seamlessly instead of disconnected pieces.
Customization Tips Make the workflow your own:
- Character swaps: Replace the panda, elephant, and puppy with animals or creatures that better suit your audience — such as koala, penguin, red panda, or fantasy options like baby dragon, small robot, or cloud spirit.
- Theme variations: This workflow works great for “adventure” stories, but it also adapts easily to “bedtime stories,” “learning colors and numbers,” or “solving simple mysteries.” Just adjust the initial story idea generation step accordingly.
- Art style control: Add specific artist references or style tags to all image prompts — for example, “Studio Ghibli inspired,” “claymation aesthetic,” or “paper cut-out style.”
- Length adjustments: Want 60-second Shorts instead of 2.5-minute videos? Simply ask for 10 scenes instead of 18 in your prompt. The structure adapts perfectly.
- Language localization: Generate stories in English first, then use AI translation tools plus ElevenLabs voice cloning to create versions in Hindi, Spanish, or any other language. The entire visual workflow remains unchanged.
Common Mistakes to Avoid
| Mistake | Why It Hurts | The Fix |
|---|---|---|
| Skipping character references | Your “baby elephant” changes color or size in every scene | Always generate and upload reference images before creating any scenes |
| Ignoring aspect ratios | Black bars or cropped characters appear in the final video | Use 9:16 for vertical Shorts and 1:1 only for character references |
| Vague motion prompts | Weird AI artifacts like melting faces or extra limbs | Use specific motion prompts such as “gentle sway” or “slow blink,” never just “animate this” |
| Over-editing transitions | Flashy effects distract from the story | Stick to simple cuts or soft fades and let the content drive retention |
| Music too loud | Viewers (especially kids) can’t hear the narration clearly | Keep background music under 20% volume, or use it only during the intro and outro |
| Publishing first drafts | AI-generated weird artifacts go unnoticed | Watch every clip carefully before final assembly and re-generate any scenes with errors |
| Inconsistent upload times | The algorithm fails to learn your audience | Choose a fixed schedule (daily or 3x per week) and stick to it for at least 30 days |
If you prefer watching the entire process instead of reading, the complete video tutorial is available on youtube @tariqpathanscienceacademy2nd
Conclusion
Creating viral AI-generated cartoon stories has nothing to do with artistic talent. It’s all about following a systematic workflow with discipline. The tools are completely free. The distribution platform (YouTube Shorts) is also free. What truly separates channels that reach millions of views from those that don’t is consistency and strict adherence to the process.
Your next steps:
- Copy the master prompts from the video description
- Run through the entire workflow once without publishing anything — just to learn and get comfortable with the tools
- Create your first “real” video and publish it
- Produce at least 10 more videos before you start judging the results
The successful channels you’re trying to compete with didn’t get 87 million views overnight. They uploaded hundreds of videos, continuously refined their prompts, and gradually learned exactly what their audience loves. AI takes care of the production. Your job is to bring the persistence.
Create responsibly — avoid any scary or inappropriate content for kids, always follow platform guidelines, and keep in mind that real children will be watching. Build content you would feel proud and happy for your own family to find.
Now go ahead and make your first video.
The algorithm is wait.