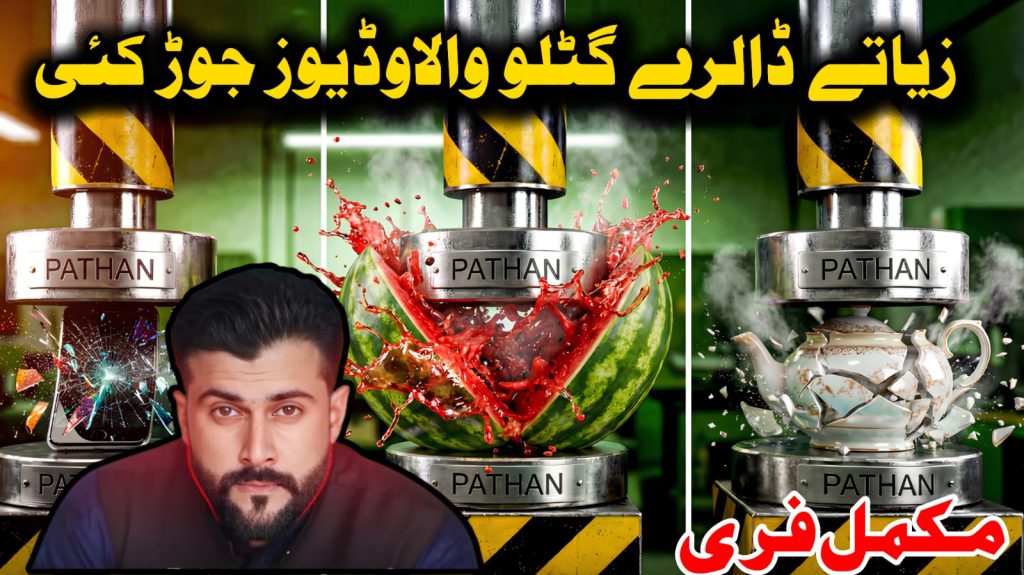

If you’ve been browsing Facebook, YouTube, or Instagram recently, you’ve likely come across a strange but popular trend — videos of hydraulic presses smashing ordinary everyday items. These clips aren’t just getting views; they’re exploding in popularity, often reaching millions of views each. Some get 18 million, others 4 million, 3 million, or 2 million — the numbers are truly impressive.
What many people don’t know is that a large number of these highly viral videos are not shot in professional studios using real heavy machinery. Instead, they are generated using affordable or even free AI tools.
The hydraulic press video trend works so well because it delivers a deeply satisfying experience for viewers. There’s something strangely therapeutic about watching objects being crushed, shattered, or destroyed under extreme force. It combines visual ASMR with the pure joy of curiosity being fulfilled. When you mix this natural audience appeal with the power and speed of AI video generation, you create a type of content that can grow and scale quickly — without needing expensive equipment, a studio, or worrying about safety risks.
The reason for this tutorial is simple: I want to make content creation accessible to everyone. You don’t need to buy a $50,000 hydraulic press or put yourself in danger by crushing glass and electronics. All you really need is to learn how to use AI tools effectively, write strong prompts that produce high-quality visuals, and keep the videos feeling real and engaging enough to hold people’s attention. By the time you finish this guide, you’ll have a clear, step-by-step process for making professional-looking hydraulic press videos that satisfy viewers and have strong potential to go viral.
Whether you’re a total beginner who has never used any AI video tools before, or an experienced creator who wants to organize and improve your workflow, this tutorial is designed to help you at your current level.
We will walk through the entire process step by step — from coming up with ideas to exporting the final video. Special focus will be given to the important details that make the difference between basic, amateur-looking videos and polished, high-quality content that stands out.
Understanding the Hydraulic Press Video Phenomenon
Before we jump into the actual step-by-step process, it’s important to understand why this particular type of content performs so strongly across social media platforms.
The Psychology Behind Destruction Content
People are naturally fascinated by the limits of materials. We’re curious to see what happens when everyday objects are pushed beyond their breaking point. Hydraulic press videos fulfill this curiosity in a safe, visually spectacular manner. Viewers experience all the excitement and drama without any real risk or anxiety, creating an ideal viewing experience.
Why AI-Generated Versions Succeed
You may be wondering: if real hydraulic press videos already exist, why would people watch AI-generated ones? The reason is simple — creative freedom. AI makes it possible to destroy objects that would be too dangerous, impractical, or extremely expensive to crush in real life. Want to flatten a diamond-covered smartphone, compress a solid gold bar, or slowly crush a classic vintage car? AI turns these wild ideas into reality without needing a huge budget or dealing with safety issues.
How Algorithms Favor This Content
Today’s social media algorithms reward videos that keep people watching until the end and have strong visual hooks. Hydraulic press videos are perfectly suited for this. The slow buildup of pressure creates natural suspense, and viewers stay engaged to see the final crushing moment. With AI, you can fine-tune every single frame to maximize viewer interest — something that’s nearly impossible when filming with a real press in just one take.
The Educational Value
Apart from being highly entertaining, these videos also offer real educational benefits. They show material science, the effects of pressure, and basic engineering principles in a dramatic and easy-to-remember way. This mix of fun and learning helps attract a wider audience and makes the content much more shareable.
1. ChatGPT (Your Creative Director and Prompt Engineer)
Use ChatGPT as your creative director and prompt engineer. You’ll rely on it to create well-structured video concepts, detailed scene breakdowns, and precise prompts for both image and video generation.
The main advantage of ChatGPT is its strong ability to understand context and keep consistency throughout multiple generations. This is essential for producing smooth, cohesive video sequences.
Why this step is important: Many creators make the mistake of skipping planning and jumping straight into image generation with vague ideas. This often leads to videos that feel disconnected and random instead of telling a clear story. ChatGPT helps you map out the entire viewer experience before creating even a single image.
2. Google Whisk (Image Generation)
Google Whisk is a free image generation tool that works great for creating the initial static frames of your hydraulic press videos. It gives you solid control over composition and style, making it perfect for showing the “before” state of the objects you plan to crush.
Beginner Tip: Although Whisk is free, you might face usage limits during busy hours. It’s smarter to generate your images in batches instead of trying to create everything in one go.
3. Google Flow (Video Generation)
Google Flow takes your static images and turns them into smooth, dynamic video clips. This is where the real hydraulic press action comes to life — the slow compression, the object deforming, and the dramatic final destruction.
Its smooth integration with Google’s other tools makes Flow especially convenient if you’re already using Google services.
Important Note: While Google Flow is responsible for creating the motion and animation, you’ll need to write your prompts very carefully to accurately capture the realistic mechanics of a hydraulic press. We’ll go over this in detail later.
4. Meta AI (Alternative Video Generation Tool)
You can access Meta AI through its web interface or directly via WhatsApp on your phone. It serves as another excellent free option for turning your static images into videos.
Having multiple tools is very useful because AI video generation can be unpredictable — sometimes an idea that doesn’t work well in one tool produces great results in another.
Pro Tip: Meta AI often delivers more realistic physics and object behavior, while Google Flow tends to produce better cinematic quality. It’s a good idea to test both tools and choose the one that best fits the style you’re going for.
5. Image Upscaling Tool (Optional but Highly Recommended)
Because the final video quality largely depends on the quality of your starting images, using an upscaling tool can make a big difference. Google Flow has a built-in 2K upscaling feature that we’ll use. If you’re working with images from Google Whisk, it’s worth running them through a free upscaler first to get sharper, clearer results in your final video.
Complete Step-by-Step Tutorial
Now it’s time to go through the actual creation process in detail. Each step builds upon the previous one, so it’s important to follow them in order and avoid skipping ahead.
Step 1: Generate Your Video Concepts and Scene Structure
What to do:
Step 1: Generate Your Video Concepts and Scene Structure
What to do:
Start by opening ChatGPT. Your goal here is not to get just any random idea. Instead, you want a complete, well-organized scene breakdown that carefully considers pacing, visual variety, and keeping the viewer engaged throughout the video.
The process involves using a specific “master prompt” for this stage, which we’ll provide in detail in the section below.
When you enter this master prompt into ChatGPT, it will generate around 15 different hydraulic press video concepts. These are not simple random object suggestions. Each one comes as a fully structured scene with specific visual moments carefully designed to maximize viewer engagement and retention.
Why this step matters:
Most unsuccessful AI-generated videos fail because of poor planning. Many creators rush straight into image and video generation without developing a proper narrative flow. A strong hydraulic press video needs a clear structure:
- Setup (showing the object clearly)
- Rising action (the press slowly descending)
- Climax (the moment of cracking or breaking)
- Resolution (the final flattened or destroyed state)
Using ChatGPT with a structured prompt ensures you consistently hit all these important beats.
Common beginner mistake:
Avoid simply choosing the first idea that seems exciting. Think carefully about your target audience and the platform where you’ll post the video. For example, Facebook viewers often prefer relatable, everyday objects like phones, toys, or food items, while YouTube audiences may respond better to unusual or high-value items. The master prompt is designed to give you a good variety of concepts so you can easily select ones that fit your channel’s style and audience.
Selection Process: Once ChatGPT provides the list of concepts, pick the one that best fits your brand and content style. The tutorial recommends selecting by number — simply tell ChatGPT which concept number you want to develop further. This will trigger the next stage: generating detailed prompts for that specific scene.
Step 2: Establish Your Channel Branding
What to do: Before creating any visuals, input your channel name or branding identifier into ChatGPT. This step is more than just decoration — the tutorial stresses that your channel name should appear directly on the hydraulic press machine in every video.
Why this matters: Branding on the machine serves several important purposes. It helps viewers instantly recognize your content while scrolling. It also protects your videos from easy reuploads by others, since your brand is visibly built into the footage. Most importantly, it gives your content a professional and intentional look rather than appearing randomly generated.
Customization Tip: Choose a name that is memorable and easy to read. Very long channel names can become hard to read or get cut off on the machine’s surface. If your name is long, consider using a shortened version or a clean logo-style text on the press, while keeping your full channel name in the video title and description.
Step 3: Generate Your Image Prompts
What to do: After selecting your concept and providing your channel name, ChatGPT will generate two key outputs: an image generation prompt and a motion/video generation prompt. Start by using the image prompt.
Copy the image prompt and go to Google Whisk. Paste it into the generation field and choose your preferred aspect ratio. For vertical short-form content (YouTube Shorts, Instagram Reels, TikTok), use 9:16. For standard YouTube videos, 16:9 usually works best.
Why aspect ratio matters: Different platforms perform better with specific formats. Choosing the wrong aspect ratio can force you to crop important parts of the image or add distracting black bars. Decide your main platform first before generating images.
Generation Strategy: The tutorial recommends creating multiple variations of the same prompt. In Whisk, this means running the prompt several times or using batch generation if available. Since AI image generation is somewhat random, having several options increases your chances of getting the best result.
Quality Check: Review your generated images and check three important things:
- Is the hydraulic press clearly visible and mechanically believable?
- Is your channel name clearly legible on the machine?
- Does the object look physically accurate and properly positioned?
If anything looks off, regenerate or refine your prompt.
Step 4: Generate Alternative Images with Google Flow
What to do: For better options and potentially higher quality, run the same image prompt through Google Flow. Flow often produces more photorealistic results, especially for complex textures like metal, hydraulic fluids, or broken materials.
Why this comparison helps: Each AI tool has its own strengths. Whisk might deliver better composition, while Flow may render metallic surfaces, reflections, or object textures more realistically. Comparing outputs from both tools allows you to choose the strongest starting image for your video.
Key Detail to Look For: Pay attention to small realistic touches in Flow’s images, such as hydraulic fluid or debris emerging from the press. These subtle details add significant production value and make the scene feel more lifelike.
Step 5: Upscale Your Selected Image
What to do: Once you’ve chosen your best image, make sure it has high resolution. If using Flow, apply the built-in 2K upscaling before downloading. If using Whisk, run the image through a separate free upscaling tool.
Why resolution matters: Video generation tools animate based on the pixels in your source image. Starting with a low-resolution image often leads to blurry or artifact-heavy motion. Higher resolution source images directly result in cleaner, sharper final videos.
Technical Note: Larger, high-quality images lead to better video output. This is especially important because platforms like YouTube apply heavy compression during upload. Starting with maximum quality gives you a better chance of maintaining clarity after compression.
Step 6: Generate Video Motion
What to do: Now comes the exciting part — turning your static image into a dynamic hydraulic press video. Go to Google Flow, upload your upscaled image using the plus button, and select the video generation option. Set the video dimensions to match your image’s aspect ratio.
Next, go back to ChatGPT and copy the motion prompt that was generated along with your image prompt. This specialized prompt describes exactly how the hydraulic press should move, how the object should deform, and what additional effects should appear.
Paste this motion prompt into Flow’s prompt field and start generation.
Why the specific motion prompt matters: Simple generic prompts like “animate this image” usually produce average results. A well-crafted motion prompt ensures the press moves at the right speed, the object breaks realistically (instead of just squishing evenly), and camera movement adds to the scene rather than distracting from it. This level of prompt engineering is what makes the difference between amateur and professional-looking videos.
What to expect: Flow will process your image and prompt to create a video sequence. The output often includes sound effects such as the whirring of the hydraulic system, the crunch of breaking material, and the final heavy impact. These audio elements play a big role in viewer satisfaction and engagement.
Step 7: Generate Alternative Video with Meta AI
What to do: For backup and comparison, create a second version using Meta AI. You can access it via the web interface or directly through WhatsApp. Upload your image, select the video creation option, and paste the same motion prompt.
Why create two versions: AI video tools can be unpredictable. One tool might produce excellent motion but poor physics, while the other nails material deformation but has weaker camera work. Generating both versions gives you options to pick the best result or even combine the strongest elements from each.
Mobile Workflow: The WhatsApp integration for Meta AI is especially useful for creators who prefer working on their phone. You can generate videos directly on mobile without constantly transferring files between devices. The quality is usually similar to the web version.
Step 8: Evaluate and Select Your Final Video
What to do: Compare the videos from Google Flow and Meta AI. Evaluate them based on:
- Realistic physics (does the object break naturally?)
- Consistent lighting and shadows
- Audio synchronization with visual impacts
- Overall satisfying and engaging feel
Selection Criteria: The “best” video isn’t always the most realistic one. Sometimes a slightly exaggerated effect feels more entertaining. Consider your target platform — TikTok viewers may prefer fast and dramatic crushes, while YouTube audiences often enjoy slower, more detailed destruction sequences.
Common Mistake to Avoid: Don’t randomly switch between tools for different videos. Consistency helps build audience expectations. Choose the tool that best matches your desired style and stick with it across your series so your content feels cohesive.
Step 9: Post-Production and Optimization
What to do: After the AI creates the main video, you’ll want to add final touches. Trim any awkward starting or ending frames, add text overlays with the object name or material type, and include your end screen or subscribe animation.
Platform-Specific Optimization:
- For YouTube Shorts: Make sure the vertical video fills the screen and add captions (many people watch without sound).
- For regular YouTube videos: Consider combining multiple crush scenes into a compilation.
- For Facebook: Uploading natively usually performs better than sharing YouTube links.
Thumbnail Creation: Even AI-generated videos need strong thumbnails. Extract a dramatic frame showing the object at its maximum deformation or the exact moment it starts cracking. Add bold text with your channel branding. Using the hydraulic press with your channel name clearly visible often makes the most recognizable and effective thumbnail.
MASTER PROMPT FOR AUTOMATIC HYDRAULIC PRESS VIDEO GENERATION
Below is the master prompt used to generate video ideas and well-structured scenes. This prompt is provided here for learning purposes only. Feel free to customize it according to the AI tool you are using.
Act as a cinematic AI video prompt generator specialized in ultra-realistic hydraulic press content.

Your style must EXACTLY match viral hydraulic press close-up shots:
- Tight vertical framing (portrait 9:16)
- Extreme close-up macro shot
- Camera placed straight-on at object level (NOT top view, NOT wide shot)
- Only press head, object, and base visible
- Background blurred industrial green
- Focus entirely on compression zone

----------------------------------------

STEP 1: Generate exactly 15 unique crushable objects.
- Include variety: brittle, soft, elastic, liquid-filled, metallic, hot objects
- Ensure each object has a distinct crushing behavior

STEP 2: Ask:
"Select one object by number."

STEP 3: Ask:
"Enter your Channel / Branding Name (this will be engraved on the hydraulic press head plate)."

----------------------------------------

STEP 4: Generate EXACTLY 3 PROMPTS:

----------------------------------------
PROMPT 1 — IMAGE PROMPT (PRE-CRUSH FRAME)

- Ultra-realistic macro cinematic shot
- Vertical frame (9:16)
- Industrial hydraulic press with yellow & black hazard stripes (same as viral presses)
- Camera angle:
 → straight front-facing
 → tightly cropped
 → zoomed into pressing area only
- Visible elements:
 → circular metal base platform
 → glowing or normal object centered
 → cylindrical press head above it
- Press head slightly ABOVE the object (NOT touching)

- Engraved metal name plate on press head:
 "[CHANNEL NAME]"

- Lighting:
 → strong studio lighting from top
 → realistic reflections on metal
 → subtle shadows under object
 → glow if object is hot

- Texture:
 → scratches, oil marks, industrial wear
 → hyper-detailed surface realism

- Depth of field:
 → sharp focus on object + press head
 → blurred background (factory green tone)

----------------------------------------
PROMPT 2 — MOTION PROMPT (FULL CONTINUOUS CRUSH – 8 SECONDS)

- Duration: 8 seconds total
- Start from the final frame of Prompt 1
- Camera remains COMPLETELY LOCKED (no movement, no zoom, no cuts)

- Hydraulic press head begins moving downward immediately
- Motion is smooth, steady, and continuous (no pauses, no stopping)

- Timeline behavior:

0s – 1s:
→ Press approaches object (still not touching at first frame, then makes contact)

1s – 3s:
→ Initial compression begins
→ Object reacts based on material:
 - cracks forming / surface deformation / pressure buildup

3s – 6s:
→ Mid to heavy compression phase
→ Object significantly deforms:
 - glass shattering
 - liquid leaking or bursting
 - rubber bulging
 - metal bending
 - hot molten squeezing outward with glow

6s – 8s:
→ Final compression phase
→ Object reaches FULLY CRUSHED state
→ Material spreads outward naturally (sides extrusion / debris / splashes)

- End frame:
 → Press fully down
 → Object completely crushed
 → Material settled on base

- IMPORTANT RULES:
 → NO stopping at halfway
 → NO upward movement
 → NO cuts or transitions
 → Continuous downward motion ONLY
 → Realistic physics based on object type

- Visual detail:
 → micro cracks, particles, liquid flow, molten texture, debris movement
 → highly satisfying, hyper-realistic finish

----------------------------------------

STRICT RULES:

- Camera MUST stay locked (no cuts, no zoom changes)
- ONLY close-up compression zone visible
- NO wide shots, NO cinematic transitions
- Real-world physics ONLY
- Ultra-real textures (metal, liquid, heat, cracks)
- Maintain viral "oddly satisfying" style

Tone:
Hyper-realistic, industrial, cinematic, macro-detail, viral content optimized
Disclaimer:These prompts are provided for educational and learning purposes only. Results may vary depending on the AI tool you use and how you customize the prompts. AI video generation is a rapidly evolving technology, and the final output quality can be affected by the specific tool version, your prompt engineering skills, and the inherent randomness of AI generation.
Always carefully review any AI-generated content for accuracy and appropriateness before publishing or sharing it publicly.
Why These Prompts Work: The Engineering Behind the Magic
Understanding why these prompts deliver strong results will help you customize them effectively and fix problems when the output doesn’t meet your expectations.
Structured Scene Breakdown
The master prompt doesn’t simply ask for random ideas. It specifically requests structured scenes that include key elements: a clear object description, the press setup, the expected destruction sequence, and important visual highlights. This built-in structure ensures ChatGPT produces practical, usable concepts instead of vague or scattered suggestions. When you later select a concept by number, the system keeps this structure intact, preserving the narrative flow that makes the videos truly engaging.
Contextual Consistency
The prompts are designed to maintain consistency throughout the entire process. Your channel name isn’t added as an afterthought — it is integrated from the very beginning of concept generation, included in the image prompts, and clearly visible in the final video. This creates a unified brand identity that viewers quickly recognize and remember.
Physics-Aware Motion Descriptions
The motion prompts carefully describe real physical behaviors, such as “the hydraulic press descends slowly,” “material fractures along stress lines,” “debris scatters outward,” and “final compression flattens the remains.” These detailed instructions guide the AI toward believable, natural-looking animations. Without this level of guidance, AI video tools often create unrealistic or dreamlike movements that ruin the viewer’s immersion.
Pacing and Sound Integration
The prompts include specific timing cues and references to audio elements. This is important because the most satisfying hydraulic press videos follow a clear rhythm: a slow initial descent builds anticipation, a sharp crack delivers the payoff, and the final flattening provides closure. When prompts clearly define these phases, AI tools are much more likely to generate appropriate timing and even include well-synced sound effects.
Camera Work Specifications
High-quality video needs deliberate camera choices. The prompts clearly define the angle, framing, and focus behavior. This prevents the common AI issue of shaky, random, or disorienting camera movement, resulting instead in clean, professional cinematography that effectively highlights the destruction.
Customization Tips for Advanced Creators
Once you’ve mastered the basic workflow, you can take it further with these improvements:
Developing a Signature Style Many creators using this same workflow have gained millions of views. To stand out, create your own visual signatures in addition to your channel name on the press. For example, you could consistently crush objects in a specific color palette, add a quick “before and after” comparison, or include a slow-motion replay of the initial cracking moment. These small touches help define your unique brand.
Seasonal and Trending Content Modify the master prompt to generate timely variations. Think about objects related to upcoming holidays or materials tied to current trends and events. The hydraulic press format is versatile enough to incorporate popular topics while keeping your core style consistent.
Series and Compilation Strategies Single crush videos perform well, but creating series helps build a loyal audience. Try themed weeks such as “Electronics Week,” “Food Week,” or “Mystery Objects Week.” Once your prompts are refined, producing ten videos takes almost the same effort as making one. You can then turn your best crushes into compilation videos for even more content.
Cross-Platform Adaptation The same core video can be easily adapted for different platforms. Turn your vertical Short into a horizontal version with added side elements, or break a long compilation into individual clips for TikTok. The AI generation is the most time-consuming part — reformatting for distribution is relatively quick and simple.
Audience Interaction Integration During the concept generation phase, incorporate suggestions from your audience. Ask your followers what objects they want to see crushed, then feed those ideas into ChatGPT. This approach builds stronger viewer investment — people are more likely to watch and share videos they helped inspire.
Common Mistakes to Avoid
Learning from other people’s mistakes can help you succeed much faster. Here are the most common pitfalls to watch out for:
Mistake 1: Skipping the Planning Phase Many creators rush straight into generating images without first using ChatGPT to develop proper concepts. This often results in random, disconnected videos that fail to build audience expectations or a strong channel identity. Spending just 10 minutes on structured concept generation can save you hours of rework later.
Fix: Always begin with the full concept generation step. Even if you already have a specific object in mind, run it through the complete workflow to properly plan camera angles, lighting, and narrative beats.
Mistake 2: Ignoring Aspect Ratio Until the End Creating a great-looking 16:9 image and then realizing you need 9:16 for Shorts forces you to either crop the composition (losing key details) or add black bars (making it look unprofessional). This significantly reduces production quality.
Fix: Decide your main platform and aspect ratio before you start generating any images. If you plan to post on multiple platforms, generate versions in both formats from the beginning instead of trying to fix it later.
Mistake 3: Accepting the First Generation Results AI tools are probabilistic — the first image or video you generate is often just average. Many beginners settle for these initial results without realizing that regenerating with the same prompt frequently produces much better outputs.
Fix: Always create multiple variations of each important asset. The workflow is designed for this — generate several images in Whisk and compare outputs between Flow and Meta AI. Never skip these comparison steps.
Mistake 4: Neglecting Channel Name Integration Branding your channel name on the hydraulic press is emphasized for good reason. Without it, your videos can be easily reuploaded by others, and you lose the benefit of instant recognition. Yet many creators treat this as an optional extra and skip it.
Fix: Treat channel branding as mandatory, not optional. If the AI has trouble rendering your name clearly, refine the prompt or simplify the text. Illegible branding is actually worse than having no branding at all.
Mistake 5: Inconsistent Upload Schedules Gaining millions of views requires consistent effort. Uploading just one video and hoping it goes viral is unrealistic. This workflow is built for efficiency so you can maintain a regular posting schedule.
Fix: Batch-produce your content. Use ChatGPT to generate 10 concepts at once, create all the images in a single session, and then generate videos over a few days. Building a content buffer helps you avoid gaps in your upload schedule.
Mistake 6: Overlooking Audio Quality While AI-generated sound effects are decent, they’re not always perfect. Timing can sometimes be slightly off, or audio quality may vary. Many beginners publish videos without properly checking the audio, resulting in content that looks good but feels slightly unsatisfying.
Fix: Always watch and listen to the full video before publishing. If the AI audio isn’t ideal, add your own sound effects or adjust the levels using simple editing software.
Bonus Tip: If you prefer watching the entire process instead of reading, the full video tutorial is available below. Sometimes seeing the actual interfaces, real-time generations, and exact clicks makes the steps much clearer than text alone. The video walks through every phase — from prompt input to final selection — giving you a practical visual reference for the complete workflow.
Conclusion: Building Sustainable Success
Creating viral hydraulic press videos using AI tools is more than just following a trending format — it’s a perfect example of how today’s creators can use technology to produce high-quality content without needing expensive equipment or traditional resources.
The workflow shared in this tutorial removes major barriers: you don’t need a costly hydraulic press, there are no safety risks, and you don’t require a studio space. What truly matters is the creative judgment that turns simple videos into engaging, memorable content instead of generic filler.
Success with this style — like any content format — depends on consistency. The mention of videos reaching millions of views is not a guarantee of overnight success. It simply shows what’s achievable when you combine smart, efficient workflows with steady, regular output. Every video you make teaches you more about what your audience enjoys. Every generation improves your prompt engineering skills. Every upload strengthens your channel’s library and its presence in the algorithms.
As you start using this workflow, always maintain high ethical standards. Label your AI-generated content clearly if the platform requires it. Be transparent with viewers about the nature of the videos — the entertainment value remains strong whether the press is real or AI-created. Focus on delivering genuine satisfaction to your audience rather than obsessing over view counts.
The tools will continue to evolve. Google Flow, Meta AI, and other platforms will update their features, and new tools will appear with different requirements. However, the core skills you develop here — structured concept generation, effective prompt engineering, visual storytelling, and consistent branding — will remain valuable across any tool or trend.
Begin with your first video. Don’t expect it to be perfect. Treat it as a learning experience, then iterate and improve. The creators currently getting millions of views started exactly where you are — running their first prompts and hoping the results would look professional. With this workflow, they do. With consistency, the results compound over time.
Your hydraulic press channel begins with a single crush.
Let’s get pressing.
Final Note: This tutorial is for educational purposes only. AI tools and their features change frequently. Always review the current terms of service for any platforms you use. Results can vary depending on the tool version, prompt customization, and your creative choices. Focus on creating real value for your audience, and genuine engagement — along with view counts — will naturally follow.